How to change a railway sleeping bag?
Railcar replacement is a critical rail maintenance task that requires precision and the right equipment. The railway back changer is an essential tool for this process, providing efficiency and safety. The procedure involves lifting the rail, removing the old sleeping bag and installing the new one. The TianNuo Machinery blog walks you through the steps, emphasizing the importance of using specialized machines to streamline work and ensure track integrity.

Raise the railway a little
Using Railroads: Raising Railroads Safely and Efficiently
The first step in changing a rail back is to raise the rail slightly. This process requires precision and care to avoid damage to the railway or surrounding infrastructure. Railroad sleeves are tools for this task, designed specifically for the weight and shape of railroads.
When using rails, proper placement is crucial. Place jacks at regular intervals along the section of track where you're replacing the jack. This even weight distribution prevents stress on any one point of the rail. Always ensure that jacks are rated for the weight they will lift—remember, rails are heavy!
Before lifting, ensure all safety protocols are in place. This includes installing warning signs and barriers to alert workers and passersby. Once everything is set up, operate the connectors slowly and in unison. The goal is to raise the rail enough to create a gap for removing the sleeping bag—usually a few inches is sufficient.
Proper placement of support blocks for stability
When lifting the rail, it's important to strategically place support blocks. These blocks provide additional stability and safety during the rail replacement process. Place them close to the connectors, ensuring they are on solid ground and able to support the weight of the rail.
The support blocks should be made of durable material—often hardwood or steel—and free of defects. They should be wide enough to provide a stable base and tall enough to support the rail at the required height. Remember, the goal is to create a stable working environment, so take the time to properly position these blocks.
Providing adequate accommodation for the removal of sleeping
With the rail raised and supported, the next step is to ensure there's sufficient clearance to remove the sleepers. This clearance is crucial not only for removing the old stud but also for inserting the new one without damaging either the stud or the rail.
Use a measuring tool to check the space between the bottom of the rail and the top of the file. You want enough room to maneuver the tools and the new sleeper. If there's not enough space, you may need to slightly adjust the height of your connectors.
Remember that while it's important to have enough space, you don't want to raise the tracks more than necessary. Excessive lifting can put stress on the railway and surrounding structures. The key is to find the sweet spot—enough space for comfortable and safe operation.

Bring out the old sleeper
Removing Fasteners: Tools and Methods
Once the rail is securely lifted, the next step is to remove the fasteners holding the old sleeper in place. This process requires specialized tools and techniques to ensure effectiveness and prevent damage to the track or surrounding components.
Start by determining the type of fasteners you'll be using. Common types include clips, bolts, or studs. Each requires a different approach and tool. For clip-on fasteners, a specialized clip remover is often the most effective choice. For bolt-on fasteners, you'll need a wrench or socket set of the appropriate size. Studs typically require a stud puller or claw.
Work methodically, carefully removing each fastener. It's important to keep track of all the removed components; you'll need them when installing the new sleeping bag. If any fasteners are damaged or worn, set them aside for replacement. This is also a great opportunity to inspect the rail for any signs of wear or damage that may require repair.
Ballast Removal: Preparing to Remove Sleepers
After removing the fasteners, the next task is to clear the ballast surrounding the old sleeping bag. This step is crucial to creating enough space to remove the sleeping bag without damaging it or the surrounding railway bed.
Use a ballast fork or specialized ballast removal tool to carefully excavate around the ballast pile. The goal is to expose enough ballast to allow for easy removal. Be careful not to disturb more ballast than necessary—you want to preserve the integrity of the track field as much as possible.
When removing the ballast, pay attention to its condition. This is a good time to identify any drainage or ballast quality issues that may require addressing. If you notice any problems, make a note of them for future maintenance.
Sleeping Bag Removal Methods: Manual vs. Mechanical
With the back open and the fasteners removed, it's time to extract. There are two main methods for this: manual and mechanical. The choice depends on factors such as the sleeping bag material, the route conditions, and the equipment available.
Manual removal involves using tools such as pins or grates to physically lift and remove the pin. This method is labor intensive and is usually used for small jobs or in areas where large machines cannot gain access. This requires a team of workers and careful coordination to avoid injury or damage to the tracks.
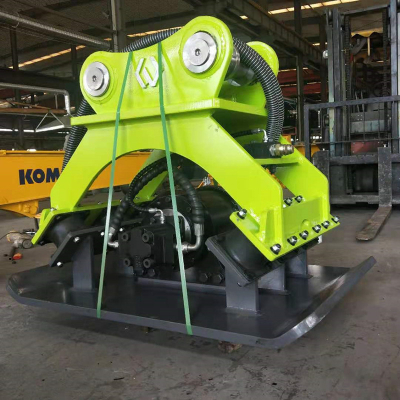
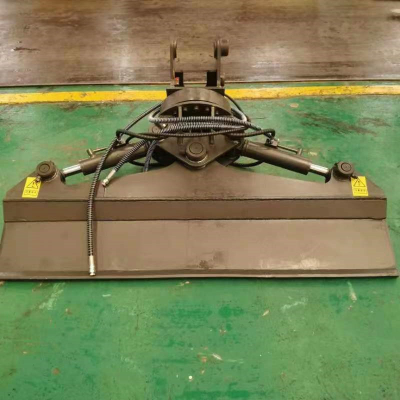
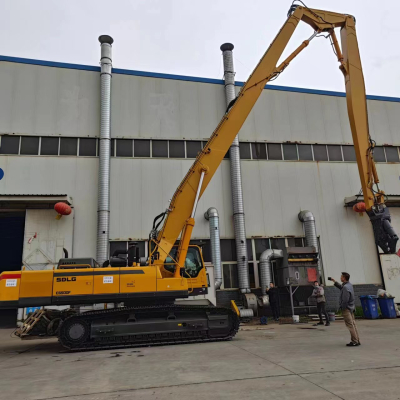
Mechanical extraction, on the other hand, uses specialized equipment such as a rail alternator. These machines can quickly and efficiently remove old sleeping bags with minimal manual labor. They are especially useful for large scale replacements or when working with heavy concrete sleepers. A railroad backrest changer can greatly speed up the process and reduce the risk of worker injury.
Regardless of the method chosen, the removal process must be carried out carefully to avoid damaging the rail or disturbing the rail field more than necessary. After the old sleeping bag is removed, inspect the area for any problems that could affect the installation of the new sleeping bag.

New Sleeper Position
Aligning the New Sleeper: Accurate Placement Tips
With the old sleeping bag removed, it's time to install the new one. This step requires precision to ensure proper alignment and stability. Start by inspecting the new sleeping bag for any defects or damage. It's important to use only sleeping bags that meet the required specifications and quality standards.
Before placing your new sleeping bag, clean the area where it will sit. Remove any debris or old ballast that may interfere with proper alignment. If you are using a railroad variable, follow the machine's instructions for precise placement. These machines often have leveling tools that help ensure accuracy.
For manual placement, use measuring tools to mark the exact position where the sleeper should sit. Pay close attention to the distance between the backrests - this should correspond to the original design of the track. The sleeping bag must be equal and at the correct height in relation to the rail. Even small discrepancies can affect track geometry and train performance.
Securing a Sleeping Bag: Securing Systems Explained
Once the new stud is in place, it's time to secure it. This process involves reattaching the fasteners you removed earlier or installing new ones if the old ones are damaged. The type of fastening system used may vary depending on the backrest material and the rail design.
For wooden sleeping bags, traditional cleat and plate systems are common. Insert the cleats into pre-drilled holes, ensuring they are securely fastened. For concrete sleeping bags, clip or bolt systems are more common. These often require specialized tools for installation, so make sure you have the right equipment on hand.
Regardless of the system, it's important to apply the correct tension to each fastener. Over-tightening can damage the back or rail, while under-tightening can lead to instability. Many modern fastening systems have specific torque requirements—adhere carefully to them for optimal performance.
Ballast Restoration: Ensuring Proper Support
The final step in positioning the new sleeper is restoring the ballast. This process is crucial to ensuring proper support for the sleeper and maintaining the stability of the route. Start by redistributing the ballast you removed earlier, ensuring it fills all the spaces around and under the new sleeping bag.
Use blasting tools or mechanical blasting to compact the ballast. This step is crucial to prevent future settlements that could affect the alignment of the track. Pay particular attention to the areas directly under the train seats—they need to be especially well supported.
After the initial removal, add more ballast as needed to achieve the correct profile. The ballast should rise to the appropriate level on the back, typically just below the bottom of the rail. Avoid overfilling, as excess ballast can interfere with rail components and maintenance.
Once the ballast is in place, perform a final check of the sleeper's position and level. Make any necessary adjustments before considering the job complete. Remember, proper ballast distribution and compaction are key to the longevity and performance of the new installation.